Motivation
Our main goal with this project was to figure out what it would take to convert a 2-d painting into a 3-d painting. There is a lot of thought that goes into the composition of a 2-d painting and the artist has a reason for each choice he/she makes, from deciding the composition to choosing the colors, to deciding how to layer the textures. In effect, the artist conscientiously selects what the viewer sees. For example, here's a an abstract painting from 1935 by Paul Klee:
The artist chose to paint the figure face on, decided to fracture the image into pieces. Even though it looks deceptively simple, it hides a lot of information. What is the person in the image looking at? What would happen if the person had been painted side-on instead of face on? How would the effect this painting has on the viewer change if the composition was changed? These are the kind of questions that could be answered if this painting were in 3d. But adding a third dimension to anything poses its own set of challenges. Here are a few that are associated with converting a painting into 3d specifically:
You have to fill in volume, i.e. what is the artist is not showing?
Here's an 3d rendition of Picasso's Guernica by artist Lena Gieseke:
This was created using Maya, Shake, and Photoshop. The individual elements of the mural were separated and then a 3D camera was moved through the resulting tableau. As can be seen, creating a walkthrough of a 2d painting allows for much deeper contemplation of the painting and strengthens the viewer's experience, which is heightened by examining details your eyes might not have seen otherwise. But a great deal of care has to be taken while converting a 2d projection to a 3d object; we should not lose sight of what the artist intended those shapes to represent while adding the third dimension.
The second problem is that 2-d paintings depict a particular scene arranged by the artist as a foreground against the background; they provide no information of what lies behind, above, below the viewer and how the object looks when viewed from another angle. It is important to know why the artist depicted a painting in the way they did to be able to fill in the third dimension.
What do we mean by 3-d painting? It is an immersive environment that starts out with the same composition as the original painting but allows the user the freedom to walk around the objects the painting depicts, and even look at what the objects are looking at, in effect creating new compositions and allowing for a deeper contemplation of the painting.
One problem with such a painting is that if the viewer is given complete freedom to walk through the 2d painting, they can see the painting from any angle, from any view point, and the painting has to maintain its aesthetic quality from all angles. In essence, a 3d painting would involve creating not one painting, but millions of paintings.
Another thing to consider is that transferring any original artpiece to a digital medium results in a loss (in some form or the other) of texture. Brushstrokes and canvas get lost on the way from physical to digital. Here's an example:

So another one of our challenges was getting the different brushstrokes and textures right.
In the next section we discuss the different iterations of two paintings, and how each was implemented.
Implementation and different iterations
1) Using a static background and 3d objects modelled in Blender
The first painting we tried to convert to 3d was Paul Klee's "Red Waistcoat."
The first painting we tried to convert to 3d was Paul Klee's "Red Waistcoat."
We decided to split the image into two parts based on the foreground/background. The background was to be a static image (created using GIMP, a GNU manipulation program) , and the foreground to be modeled as 3D objects using Blender. The actual 3d painting was developed using Processing (a visual programming language). The 3D objects were exported from Blender as obj's, and imported into Processing.
Here is the static background:
We started out by replacing each long black stroke with a cylinder modeled in Blender. But that didn't work out because the strokes looked too clean. Then we tried using metaballs instead of meshes in blender. Metaballs look much less rigid than a mesh, are easier to model with, and they also look more like brushstrokes.
We then imported them into the Processing sketch using the Saito OBJ loader. A good tutorial for doing that can be found here. We set up the sketch with the background image shown above. The sketch also had a 3d camera, which enabled the viewer to zoom, as well as change the angle at which they were viewing the object at. Here's how the sketch looked after we had imported a few metaball-brushtrokes:
As can be seen, the brushstrokes look better than rigid cylinders, but they still look too clean. Also, when the camera was used to rotate the scene around, the painting looked weird because you could see past the edge of the quad:
So we decided to implement a skybox. A skybox is a textured cube that is placed around a 3d scene to give an effect of an infinitely far away background. For example:
This scene was rendered in 3d by mapping 6 textures to different faces of a cube. This is how a cubemap texture is cut out:
We used this technique to create textured surroundings for the 3d objects so that no matter how the objects were rotated, there would always be something behind them as a background.
2) Joan Miro's Blue I using a skybox and with billboarded images
We used a single texture for the cubemap. It was created in Gimp using brushes from the Gimp Painting Studio suite (specifically created for brush and canvas effects). We also applied a seamless texture on the cube so when it is mapped onto the cube, the seams of the cube did not show.
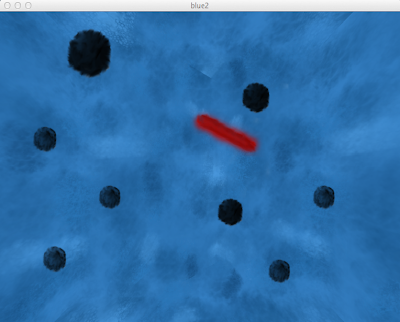
Here is the final sketch:

This 3d painting allows for rotation as well, but because of the skybox the background is maintained throughout.
3) Joan Miro's Blue I with multiple textures
For the next iteration we used multiple skyboxes, one with the other. All skyboxes except the outermost one were transparent. The smudge tool from GIMP allowed us to blend all the textures from all the skyboxes together. Here are the four textures we used:
The 3d objects were also created in GIMP. The trick was to use a transparent background for each object image and to blend each opaque object with the transparent background. The resulting images were:
These images were then billboarded, giving a 3d effect. Billboarding is a technique that involves rotating an object with the camera, so that regardless of the viewpoint, the object always faces the user.

Next Steps and Ideas for Future Work
- Better Blue I, put it on the 3D wall: The 3d version of the painting doesn't look as exact as the original, so maybe the next step would be make it look more like the original. Some of the seams still show when the skyboxes rotate, so we could also figure out a way to get rid of them. We could also study the original painting as well as the artist and use that to better inform our decision about the positions of the objects with respect to one another. Right now they are all random, but maybe we could give more thought to that. One of the suggestions I got was that maybe the artist did not intend the objects to be fuzzy sphere, but rather, black holes. Also, maybe the artist didn't intend the background to be infinitely far away. We could incorporate some of these suggestions and see where that would lead us.
- Create a series of Miro's: We could start out with a 3d painting, and make the objects interactive so that when a viewer clicks on them, they transform themselves and their backgrounds into another Miro. It would be interesting to create such a series of Miro's.
- 3D fractal: It would also be interesting to create a 3d fractal skybox. Say the skybox had a fractal texture. Then you could zoom in to a particular point in the pattern, and then if you zoom in enough you would end up with the same background (and skybox) again.
- Art cube of 3d paintings: It would be interesting to create a 3d painting that folds into others like the one in the video here, but from the inside:
.++Drawn+One.+1935..jpg)


